Download Ambiera CopperCube Pro v5.2.2 – Software for creating 3D applications under Windows and the Web
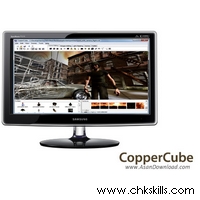
Ambiera CopperCube ProA professional tool for software development and 3D tutorials. Undoubtedly, you’ve come up with coding software and after the completion of the work, you intend to develop the training to use it and in the same direction, trying to find the software for professional training. As such, we offer you the Ambiera CopperCube software, because it allows you to create professional 3D tutorials, and at the same time has a high degree of simplicity that makes beginners like Professionals will work on 3D design. As well as other features of this software is the ability to build games and software and 3D tutorials under the web. The most important feature of this software is the ability to 3D-design in all areas without the need for programming knowledge, so that each operation requires only a simple click.
Key features of the Ambiera CopperCube Pro software:
– Ability to build 3D tutorials
– Ability to create software and 3D games
– Ability to create software and games and 3D tutorials on the web
– 3D capability in the mentioned categories No need for programming knowledge
– Ability to install on all Windows operating systems
– Simple and user-friendly environment
Download
software download direct link – 34.6 MBPassword
Installation guide
– After downloading the program by WinRar , remove the files from the compressed state.
– Before installing the software, disconnect your internet connection and then install the software.
– In the final step, remove the tick for execution of the program and, if the software is running, by right-clicking on the program icon in the taskbar, exit the application clock.
– Copy the contents of the Cracked file folder to the location of the software and replace the previous files.
– Run the software and use it without limitation.
Software installation location: The installation location folder is usually located in the Windows drive and in the Program Files folder. You can also find the installation location by using this method:
– In Windows XP: After installation, right-click on the shortcut in the Start menu and click on the Properties option and then click Find Target.
– In Windows 7: After installation, right-click on the shortcut in the Start menu and click on the Open file location option.
– In Windows 8: After installation, right-click on the Shortcut on the Start Screen and click on the Open file location option, in the window that opens, right-click on the shortcut of the software and click Open file location click.
– On Windows 10: After installation, right-click Shortcut on the Start menu and click on the Open file location option, in the window that opens, right-click on the Shortcut software and click on the Open file location button. do.


Great write-up, I’m regular visitor of one’s site, maintain up the excellent operate, and It’s going to be a regular visitor for a lengthy time.
You got a very superb website, Glad I detected it through yahoo.
Thanks, I have just been searching for information about this topic for a while and yours is the best I’ve found out so far. However, what about the conclusion? Are you certain about the supply?