Download SILKYPIX Developer Studio Pro v6.0.19.0 – Editing and converting images with the best quality
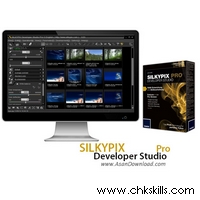
SILKYPIX Developer Studio Pro is a global and well-known developer that has the ability to achieve the best results in the field of images, and utilizes professional parameters along with the user interface to enhance image quality in the best possible way. The software is also as complete for professional users as it is for beginner users, so both users can download and install this software to access high-quality images and use this software. Work benefited. Coordinate with various camera cameras that cover most of the models, identifying and supporting various image formats, photo editing, formatted storage, and custom quality, and dozens of other features that are available in this tool. To be seen.
Key Features of SILKYPIX Developer Studio Pro:
– Photo editing in semi-professional mode
– Ability to create non-destructive edits on images
– Ability to fix pixel errors
– Ability to print high-quality and high-speed photos
– Effect of different effects and settings
– Support 120 different camera types
– Ability to create results in JPG and TIFF formats
Download
Download Direct Link Software – 152 MBPassword
Installation guide
– After downloading the program by WinRar , remove the files from the compressed state.
– Before installing the software, disconnect your internet connection and then install the software.
– In the final step, remove the tick for execution of the program and, if the software is running, by right-clicking on the program icon in the taskbar, exit the application clock.
– Copy the contents of the Cracked file folder to the location of the software and replace the previous files.
– Run the software and use it without limitation.
Software installation location: The installation location folder is usually located in the Windows drive and in the Program Files folder. You can also find the installation location by using this method:
– In Windows XP: After installation, right-click on the shortcut in the Start menu and click on the Properties option and then click Find Target.
– In Windows 7: After installation, right-click on the shortcut in the Start menu and click on the Open file location option.
– In Windows 8: After installation, right-click on the Shortcut on the Start Screen and click on the Open file location option, in the window that opens, right-click on the shortcut of the software and click Open file location click.
– On Windows 10: After installation, right-click Shortcut on the Start menu and click on the Open file location option, in the window that opens, right-click on the Shortcut software and click on the Open file location button. do.


Wonderful goods from you, man. I’ve understand your stuff previous to and you are just extremely fantastic. I really like what you’ve acquired here, certainly like what you’re saying and the way in which you say it. You make it entertaining and you still care for to keep it sensible. I cant wait to read far more from you. This is actually a wonderful website.
Very soon this webb site wil bee famous amid all blogging
users, due tto it’s good posts
Interesting blog! Is your theme custom made or did you download it from somewhere? A theme like yours with a few simple tweeks would really make my blog jump out. Please let me know where you got your design. Thank you
It iis not my first tkme tto go to see thnis web site, i amm browsing tthis webb sijte ddailly and obtazin pleasant data fdom hee daily.